

The NCIDQ Part 3 Practicum exam is just as much a test of competency and level of knowledge as it is a test of working efficiently. You have to draw quickly while being accurate and thorough. Every minute counts, so anything you can do to save time helps! TIP #1: Pre-cut your tracing paper the night before the exam, so you don’t have to tear it during the test. Roll up 7-10 sheets of pre-cut trace paper and pack your entire roll as a back-up in case you don’t have enough during the exam. In between each section, pull out a couple more sheets, so you’re ready to go!
TIP #2: Drafting dots. They’re more expensive than the tape, and you’re probably thinking, “I can handle tearing off my own tape”. But, come exam day, it’s so much quicker to pull a dot out of that little box than fumble around with a roll of tape and trying to find where the end of tape is. I love these little guys!
TIP #3: Use permanent marker to trace around the inside of your most commonly used shapes in your template. Have a circle template with 15 circles on it that you only use to draw your 60” turning radius? Take a sharpie, and trace the inside of the 1-1/4” circle so that when you have it on top of white paper, it stands out like a sore thumb. You can also use it to highlight toilets, door swings, and other elements commonly used.

Tip #4: Two words: graph. paper. Because you won’t be allowed to use slider bars or drafting tables during the exam (and most examinees don’t go out and purchase a drafting table for the day of the exam), simply tape down ¼” graph paper across your table before the exam starts. It will help you draw straighter lines, and assist with quickly determining distances for exercises in quarter inch scale. It can be especially helpful for the space planning, lighting and millwork exercises.
TIP #5: You may have already been tempted by the set of 9 drafting templates sold by QPractice for $85.00. But, who has room for all of those templates on their table come exam day?! It feels like you already have 60 things to juggle on your table and try to keep straight. When I took the practicum in the fall of 2014, I used THREE templates, and they were much cheaper than the $85.00 price tag QPractice charges for their set. The templates I used were a ¼” Furniture Template, a Circle Template, and ¼” Expanded House Plan Template. This covered all of my plumbing, furniture, door swings, electrical symbols, and turning radiuses.


TIP #6: Arrive early on exam day and get everything organized. Consider using a Tupperware container to hold all of your markers and templates on the table during the exam. It keeps everything organized. Arriving early also allows time to tape down your graph paper and pull out your first couple pre-torn sheets of tracing paper.
TIP #7: Test your writing supplies on velum before exam day! A lot of writing supplies will smear on velum. Make sure you’re not halfway into space planning before your hand smears your newly drawn walls all the way across the page. The very best pen I found was the Pilot G-2 Ultra Fine .38. The ultra fine tip made it so easy to draw little details and I liked using the different colors to color code certain features. NOTE: One of the unique features of this pen is the .38 fine tip. Be careful not to purchase the G2 .7 pens – the heavier tip will make it harder to draw finer details.
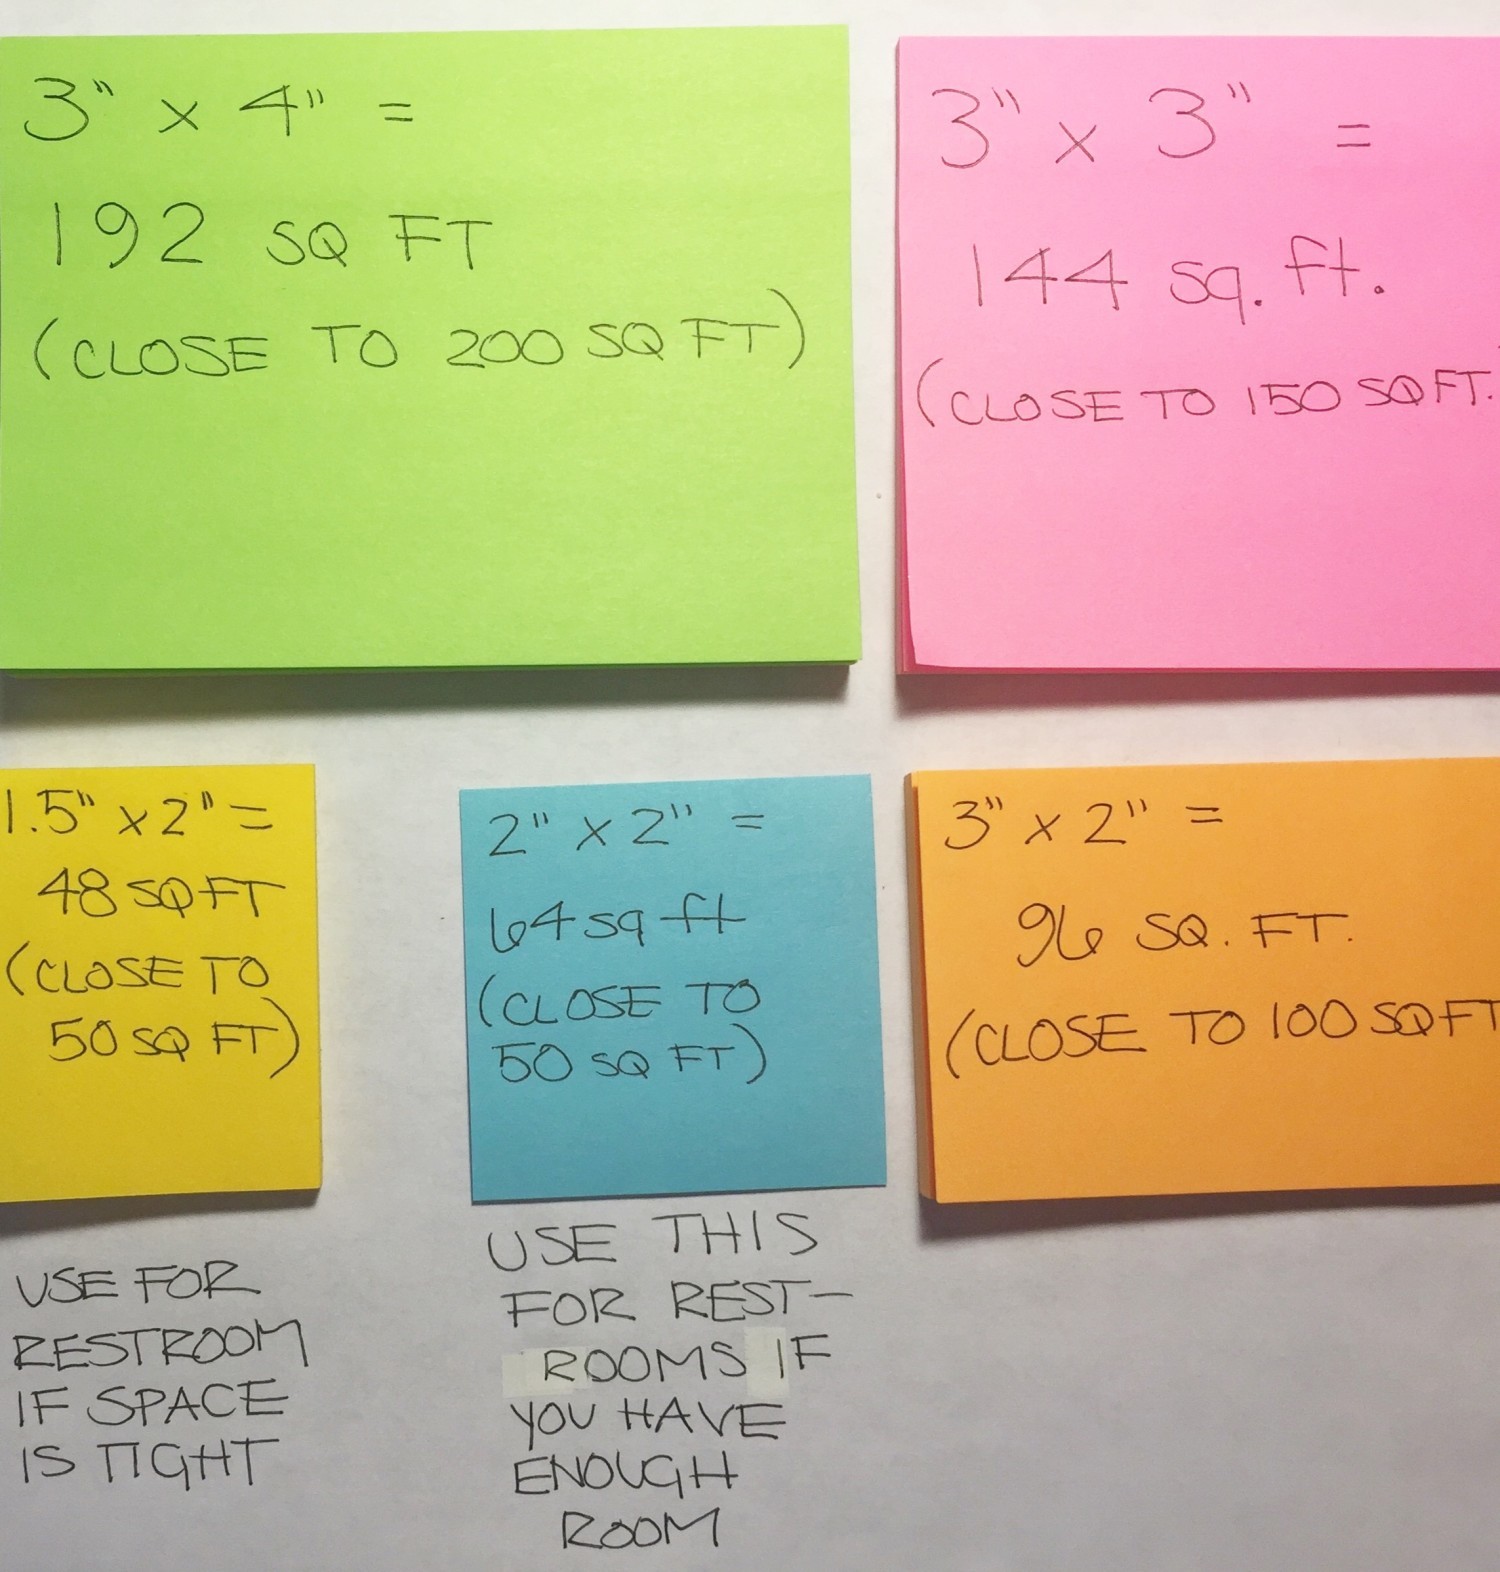
TIP #8: Sticky notes come in tons of different sizes, and when scaled in quarter inch, they are quite close to key square footage numbers often used in the space planning exercise. For example, restrooms often have a minimum square footage of 50 sq. ft. – A 2”x2” sticky note (64 sq ft in ¼”=1’-0” scale) works really well as a size for accessible bathroom. If you don’t have extra space for the additional 14 sq. ft., you can always use a 1.5” x 2” sticky note (48 sq ft) as an approximate guide during initial space planning. Using sticky notes allow you to move rooms around the space and see where they fit best without picking up a pencil.
TIP #9: Make sure you have all of your drafting supplies organized and packed the night before so you can feel as relaxed as possible the morning of. Wondering what tools I used during the practicum exam? Here’s an image of the drafting tools I packed the night before my exam.

TIP #10: Keep an eye on the clock. Even though these tips will help save you time on your exam, time will still be tight! Some exam rooms don’t have a clock on the wall in front of you. It may be behind you, or difficult to see. Pack a little mini clock to sit on your drafting table (make sure it does not tick or make noise), so you don’t have to worry about looking around the room for the clock during the exam. Not only does it save time from having to look up, but it will help keep you on track to passing your exam!
Best of luck, and let me know if there are any additional questions I can answer for you during your journey to becoming a certified interior designer!
Autumn Fuchs, NCDIQ Interior Designer